Unlock the Secrets: From Brining to Basting for Your Best Smoked Turkey
There's nothing quite like the aroma and taste of a perfectly smoked turkey. The crispy, seasoned skin giving way to incredibly juicy, tender meat is a culinary experience that elevates any meal, especially a holiday feast. If you're ready to transcend the ordinary and create an ultimate smoked turkey recipe that will be remembered for years, you've come to the right place. This comprehensive guide will take you through every crucial step, from the foundational brine to the final, savory basting, ensuring your turkey is nothing short of magnificent.
Smoking a turkey is not just about imparting a delicious smoky flavor; it’s a method that promises unmatched moisture and tenderness. Moreover, it's a brilliant strategy for holiday entertaining, as it frees up valuable oven space for all your other festive dishes. Imagine the possibilities when your oven isn't monopolized by the main course! Discover how you can free your oven for Thanksgiving success and impress your guests with a bird that's moist on the inside and beautifully smoked on the outside.
The Brine: Your First Step to Unbeatable Juiciness
The journey to an ultimate smoked turkey begins long before it ever touches the smoker – it starts with the brine. Brining is the secret weapon against dry turkey, infusing the meat with moisture and seasoning it from within. This crucial overnight step guarantees a succulent result every time.
Crafting the Perfect Brine Bath
To begin, select a container large enough to fully submerge your turkey. A clean, food-grade cooler is often ideal for larger birds, but a large stock pot or brining bag can also work. The goal is to measure precisely how much water you'll need. Place your thawed turkey into the container, then fill with enough cold water to just cover it completely. Remove the turkey, noting the water level or volume.
Now, for the magic mixture: for every gallon of water you measured, you'll want to add equal parts salt and sugar. A good starting point is approximately one cup of kosher salt and one cup of granulated sugar per gallon. Stir this vigorously until both the salt and sugar are completely dissolved. It's vital they dissolve fully to ensure even distribution of the brine's power. Once dissolved, return the turkey to the brine solution.
Temperature control is paramount for food safety. Add plenty of ice to the cooler or container until the brine temperature is maintained at a steady 40°F (4°C) or below. This mimics refrigerator temperatures, keeping your turkey safe as it brines overnight, typically for 8-12 hours depending on the turkey's size. Avoid brining for too long, as it can make the turkey overly salty or give it a somewhat cured texture.
Setting the Stage: Smoker Prep & Turkey Seasoning
With your turkey thoroughly brined, the next phase involves preparing both your bird and your smoking apparatus. This stage is where you build layers of flavor and ensure optimal cooking conditions.
Turkey Preparation & Flavor Infusion
The morning of your smoke, carefully remove the turkey from the brine and discard the liquid. Rinse the turkey thoroughly inside and out under cold water to remove any excess salt from the surface, then pat it completely dry with paper towels. A dry surface is crucial for achieving that desirable crispy skin. Allow the turkey to sit at room temperature for approximately two hours before it goes into the smoker. This helps it cook more evenly.
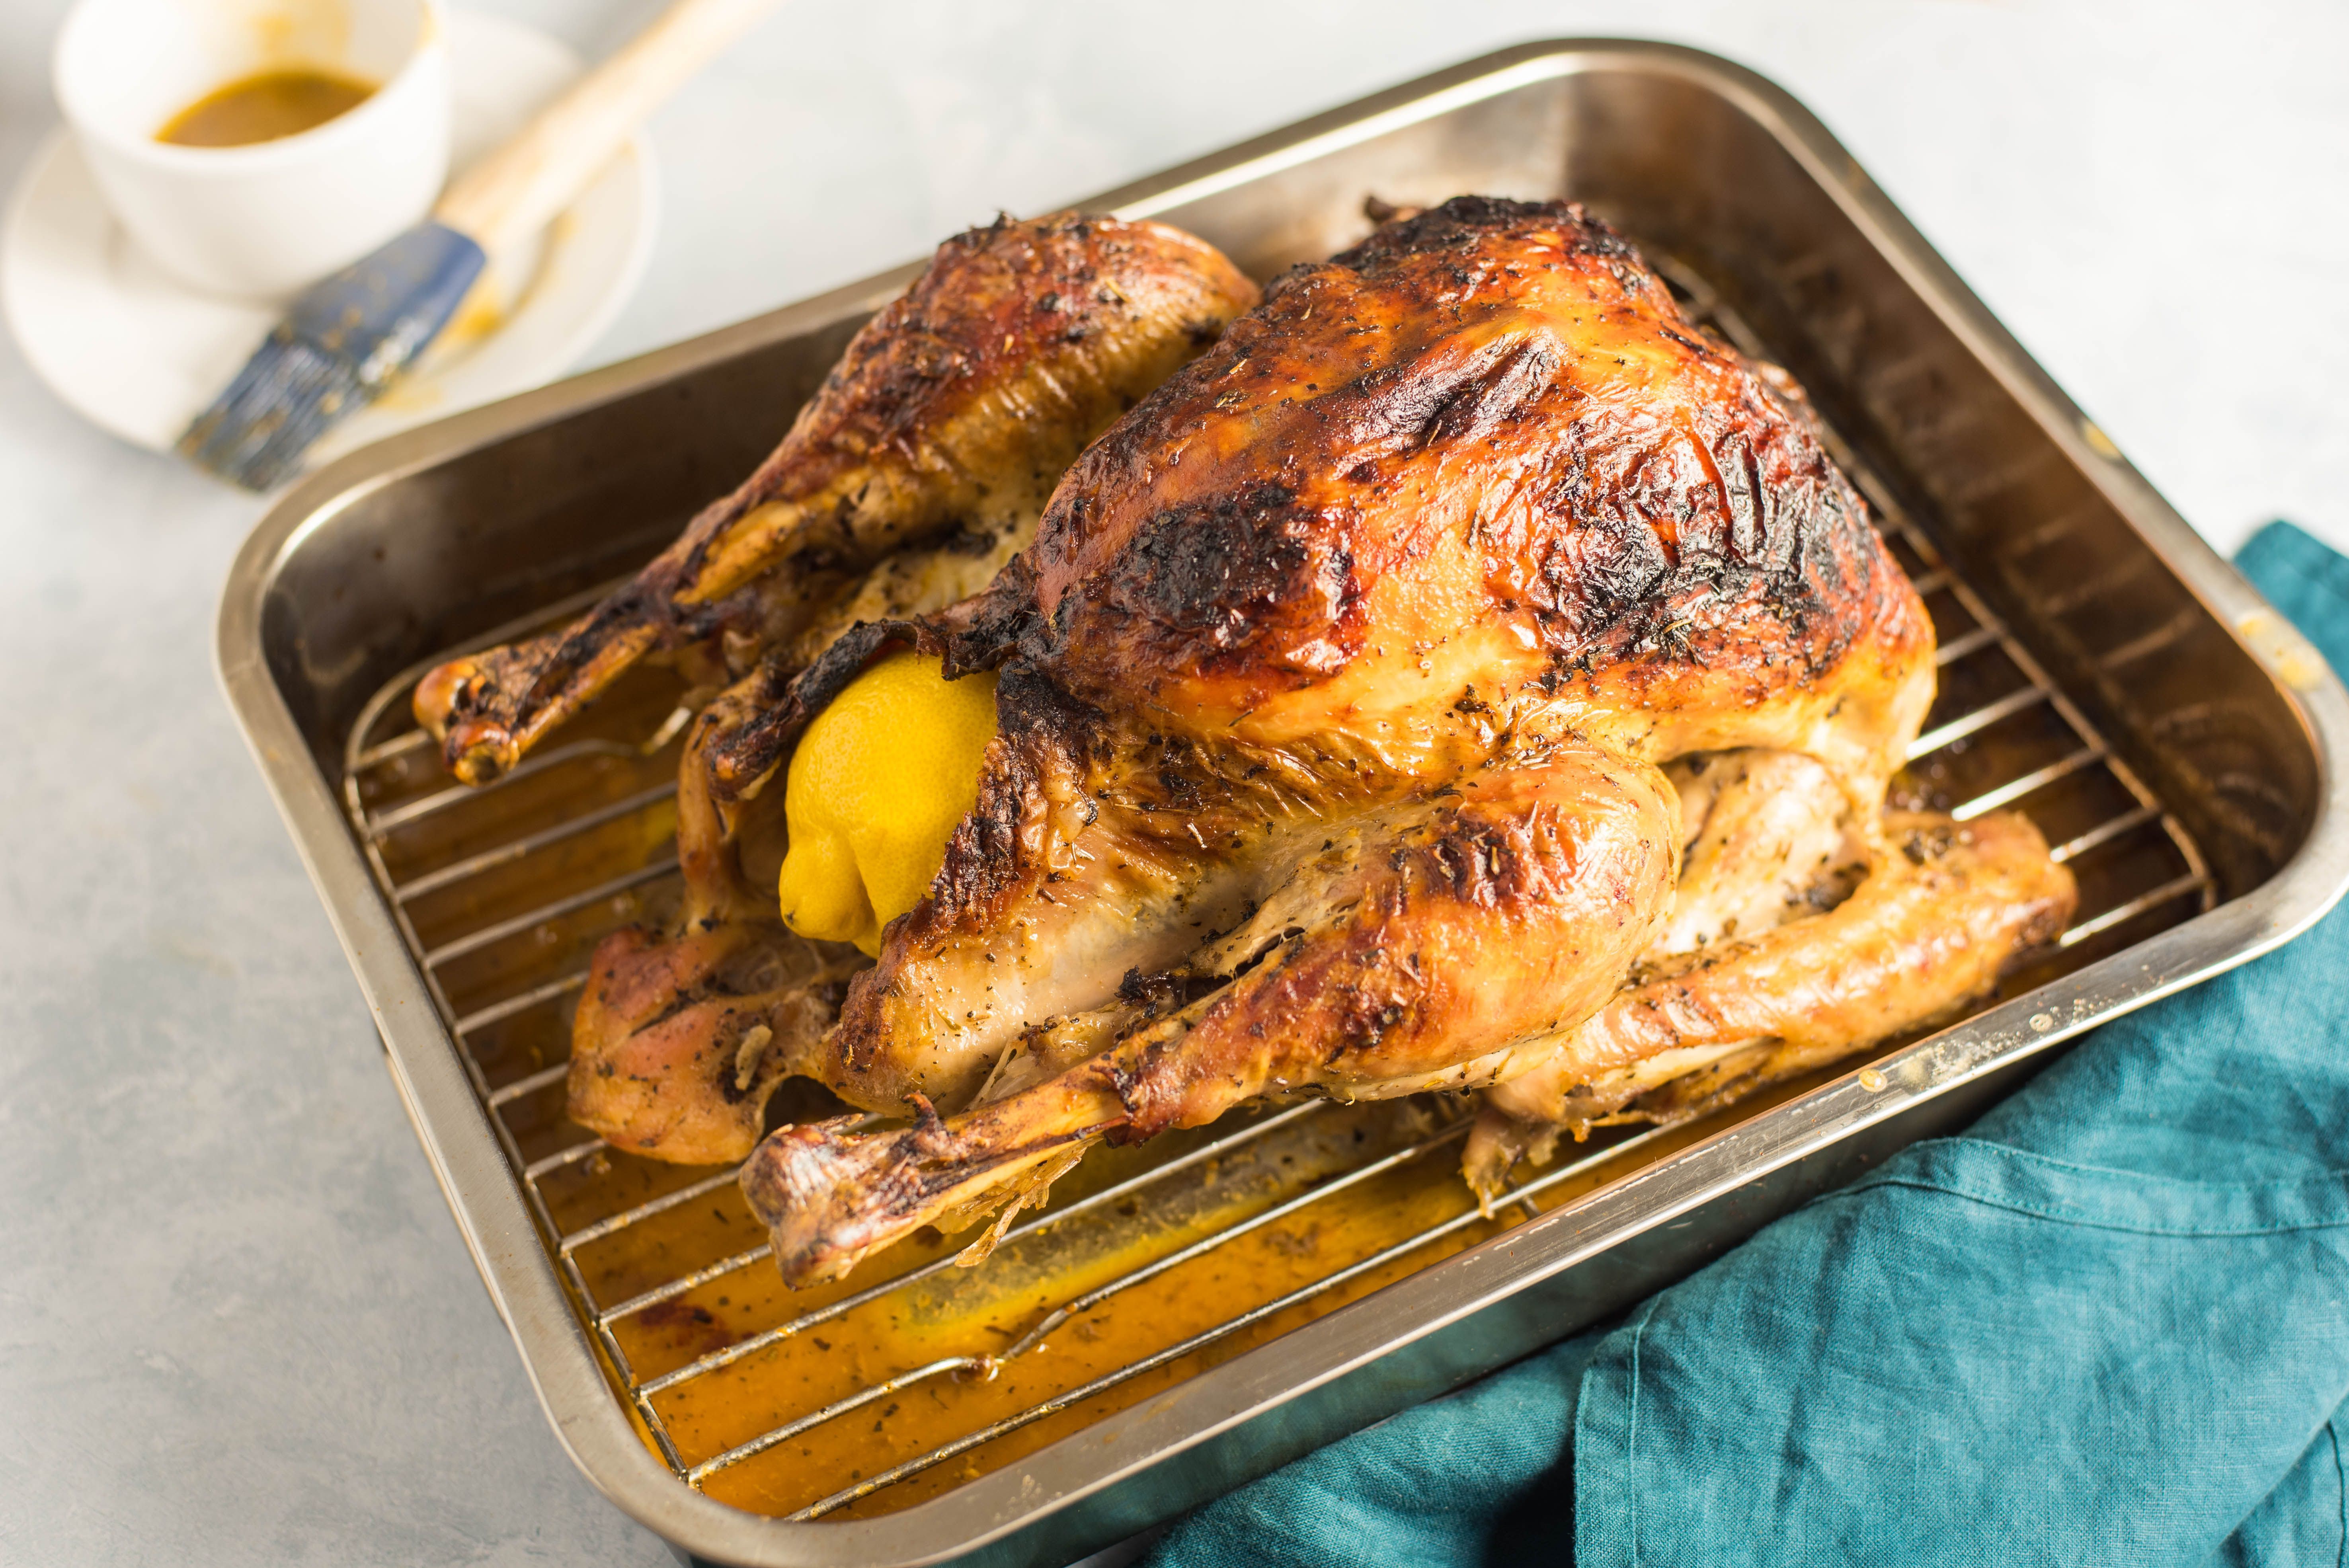
While the internal stuffing of a turkey can sometimes hinder even cooking and isn't always recommended for smoked birds, filling the cavity with aromatics is an excellent way to infuse subtle, complementary flavors. For a truly aromatic experience, pack the cavity with sliced oranges and lemons, pats of butter, whole garlic cloves, fresh rosemary sprigs, and a generous sprinkle of salt and pepper. On the exterior, rub the entire skin with olive oil, which acts as a binder for your seasonings and promotes beautiful browning. Finish with a liberal dusting of salt and pepper, or for an even deeper flavor profile, apply your favorite homemade BBQ rub or a classic turkey rub.
Mastering Your Smoker Setup
Regardless of whether you're using an electric smoker, gas grill with a smoker box, or a traditional manual smoker, consistency is key. Your primary goal is to maintain an ambient smoking temperature as close to 225°F (107°C) as possible. For gas grills or manual smokers, aiming for 225-250°F is a good range. Ensure your chosen energy source (charcoal, pellets, propane, gas) is stocked up, as your turkey will be smoking for several hours.
When it comes to smoke, aim for thin, light blue smoke. Thick, white smoke indicates incomplete combustion and can impart a bitter flavor to your turkey. For wood, apple wood chunks are highly recommended for their mild, fruity flavor that complements poultry beautifully. Other great options include cherry, pecan, or a subtle hickory. A disposable drip pan placed directly beneath the turkey is essential to catch all those flavorful drippings, which can later be used to make a phenomenal gravy.
Lastly, no smoking journey is complete without a reliable thermometer. A high-quality digital probe thermometer, like the Thermaworks Dot, is indispensable for accurately monitoring the turkey's internal temperature without constantly opening the smoker. If using a gas grill, a smoker box is necessary to hold your wood chunks and create that essential smoke flavor. For added moisture and crust development, a water bottle filled with apple cider vinegar or water can be used to spritz the turkey periodically during the cook.
The Low & Slow Smoke: Monitoring for Perfection
With all preparations complete, it's time for the "low and slow" magic to happen. This phase requires patience and diligent monitoring to achieve that ultimate smoked turkey recipe.
Smoking Timelines and Temperature Targets
Place your prepared turkey in a roasting tin with a couple of inches of water in the bottom, then loosely cover the tin with aluminum foil. This creates a moist environment, preventing the turkey from drying out in the initial hours. Smoke at a consistent 225°F (107°C).
A good general guideline for smoking time is approximately 25-30 minutes per pound at 225°F. So, a 10-pound turkey might take around 4 to 5 hours. However, these are just estimates; the true indicator of doneness is the internal temperature. Your target internal temperature for the thickest part of the breast (avoiding the bone) should be 180°F (82°C). While 165°F (74°C) is the food safety minimum, cooking to 180°F, as preferred by many pitmasters, often results in an even juicier, more tender texture, especially in the dark meat.
To maximize smoke penetration and flavor, add apple wood chunks to your fire every 30 minutes for the first three hours of the smoking process. After the initial three hours, the turkey's pores will have closed, and adding more wood will have less impact on flavor, but you should continue to maintain your heat source.
A crucial tip: For food safety, it's best to smoke turkeys that weigh under 15 pounds. Larger birds take significantly longer to pass through the "danger zone" (40-140°F / 4-60°C), where bacteria can multiply rapidly. Planning to finish your turkey about 30 minutes before you intend to serve it is always a good idea, allowing for essential resting time.
The Finishing Touch: Basting, Resting & Carving
As your smoked turkey approaches its target temperature, the final steps are critical for achieving that perfect golden-brown skin and ensuring maximum juiciness.
Crispy Skin and Flavorful Finish
During the last hour of smoking, remove the turkey from the roasting tin and discard the foil. This allows the skin to be exposed directly to the heat and smoke, promoting crispiness. This is also the perfect time to begin basting. Generously brush the turkey skin with melted butter. The butter not only enhances the flavor but also helps the skin achieve a beautiful golden-brown color and a wonderfully crispy texture.
The Indispensable Rest
Once your turkey reaches the internal temperature of 180°F (82°C) in the thickest part of the breast, carefully remove it from the smoker. Transfer it to a clean cutting board and tent it loosely with aluminum foil. This next step is perhaps the most important for a truly juicy turkey: let it rest for at least 30 minutes. Resting allows the internal temperature to continue to rise slightly (carryover cooking) and, more importantly, gives the juices that have been driven to the center of the bird during cooking time to redistribute throughout the meat. Skipping this step will result in a dry turkey, regardless of how perfectly it was cooked.
After resting, carve your magnificent smoked turkey against the grain to ensure every slice is tender and succulent. Don't forget to use those flavorful drippings from the drip pan to make an incredible gravy that will perfectly complement your masterpiece.
Conclusion
From the meticulous preparation of a flavorful brine to the patient art of low and slow smoking, and finally, the crucial resting period, every step plays a vital role in crafting the ultimate smoked turkey recipe. By following these secrets, you'll produce a turkey that boasts unparalleled juiciness, tender meat, and a depth of smoky flavor that will impress even the most discerning palates. So, gather your tools, fire up your smoker, and prepare to elevate your holiday table or any gathering with a turkey that truly stands out.
